Sunday, 28 October 2012

Is Windows 8 Worth The Upgrade?

I have taken some time off to surf through the internet and find out what people think about this latest product from the stable of Microsoft.... The Windows 8. So far, Windows 8 has been the major topic of discussions across websites and blogs on the web.
Microsoft says that Windows 8 is the future – a world where traditional desktop computing and touch computing can live in harmony. A future where all your content is at your fingertips at all times.

But the question is.... Is the future worth it?

The most obvious change is the new start menu. Upon booting up, Windows 8 now presents you with a screen of multi-colored blocks called “Live Tiles” that feature all of your content front and center. All of your music, videos, pictures, games and more are made readily available for your consumption.
The same goes for apps – a major driving force for Windows 8. Microsoft wants to emulate the success of Apple’s App Store with its own Windows Store. It’s a carefully curated marketplace of apps built specifically for Windows 8. A number of companies, including Google, Skype and Netflix, have already produced apps for Windows 8. Unfortunately, there’s still not enough apps in the marketplace to have it replace the traditional desktop operating system.

Windows 8 is totally different from anything on the market today... But what does the general public think of Windows 8? Are you willing to upgrade?


Vibrant and beautiful, the Start screen is the first thing you'll see. Each tile on the Start screen is connected to a person, app, website, playlist, or whatever else is important to you. Tiles light up with the latest info, so you're instantly up to date. In one glance, you'll see that photo you were just tagged in, tomorrow’s weather, and messages from your friends.

A lot of users see this as the downfall of Microsoft and are already making up their minds to turn over to Apple or Linux.
For consumers interested in Windows 8, Microsoft is currently running a deal where existing Windows XP, Vista or 7 owners can upgrade to WIndows 8 for only $39.99. As far as Windows goes, that’s a fantastic deal that might help Microsoft gain some traction among the consumer market. As for enterprise customers, you already have your own special option. 

But the Big question still remains.... Are you willing to Upgrade?

Saturday, 27 October 2012

KYD Evolution Launches Unilorites.com

After a couple of weeks working on this project, it has finally been unveiled to the general public today, 27th of October. The Unilorites website at http://www.unilorites.com is now open to registration. The website that is basically centered on the world of the University of Ilorin, Nigeria. The students, graduates, and every other person interested in getting cool stuffs and info about the school are all invited. Although to access the website, one must register.
MORE ON THE WEBSITE
The website was built using the Simple Machines Content management system for building forums, SMF. Using a cool Firebrick template that has undergone a little modifications in the right places.
Unilorites.com is currently undergoing a test run, in order to inquire what unilorites want and what features they would love to have on the site.

The Major features of the website include:.
  • The ability of users to choose from four different themes with unique layouts.
  • A shop feature where the user can acquire a couple of tools to make their stay more comfy.
  • Ability to rate posts and also share them over social medias including Facebook and twitter. 
These and many more are cool things that unilorites are gonna benefit from by using unilorites.com.

Unilorites was purposely released today to celebrate the birthday of  the AceKYD. 
Happy Birthday Ace. 

Greatest Unilorite!!!

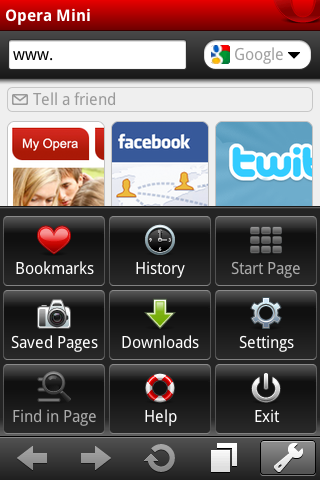
How To resume Downloads On Opera Mini


KYD Evolution: How To resume Downloads On Opera Mini 

Sometimes when you download files using Opera Mini and the internet gives you bad connection, you'll experience unexpected failures. You shout in anger and disappointment, and you lose your files.
Okay, your download may continue, but it restarts the stage, which means the file will be corrupted -- or at least you have to delete and wait for the downloads to start from the beginning again, robbing your valuable time.
Use this simple trick to solve the problem.
  1. If a download fails at any stage, leave Opera Mini running, without clearing the downloads or closing the application.
  2. Go to the downloads folder and move the failed file to another location.
  3. Get back to opera and restart the download.
  4. Once it gets started, pause the download immediately. Then you go to the downloads folder, selects the paused file, and replace it with the originally failed file. (To do this step, however, your phone has to support multi-tasking feature. Nokia N70, which I'm currently using, allows me to run multiple applications, so I have no problem with this step).
  5. Now get back to Opera Mini and just resume the paused download, and whoa, to your surprise, the download resumes from where it had failed.
This trick helps you, especially when you need to resume files like movies, ebooks, and other large documents.
It worked on my Opera Mini 6, either Java or Symbian version.

SPEED UP YOUR COMPUTER WITH READYBOOST

ReadyBoost can speed up your computer by using storage space on most USB flash drives and flash memory cards. When you plug a ReadyBoost-compatible storage
device into your computer, the AutoPlay dialog box gives you the option to use ReadyBoost. If you select this option, you can choose how much memory on the
device to use for this purpose.

HOW TO TURN ON READYBOOST
  • Plug a flash drive or flash memory card into your computer.
  • In the Autoplay dialog box, under General options, click Speed up my system.
  • In the Properties dialog box, click the ReadyBoost tab, and then do one of the following:
  • To turn ReadyBoost off, click Do not use this device.
  • To use the maximum available space on the flash drive or memory card for ReadyBoost, click
  • Dedicate this device to ReadyBoost. Windows will leave any files already stored on the device, but it'll use the rest to boost your system speed.
  • To use less than the maximum available space on the device for ReadyBoost, click Use this device, and then move the slider to choose the amount of available space on the device you want to use.
  • Click OK.
  • Move the slider to choose how much space you want to designate for boosting your system speed.

Notes
If AutoPlay doesn't open, it might be disabled.

For ReadyBoost to effectively speed up your computer, the flash drive or memory card should have at least 1 gigabyte (GB) of available space. If your drive or
card doesn't have enough available space for ReadyBoost, you'll see a message telling you to free some space on it. For best results, use a flash drive or flash
memory card with at least double the amount of available space as the amount of memory (RAM) in your computer.

Thursday, 18 October 2012

How To Add Programs To Windows Startup

KYD Evolution: How To Add Programs To Windows StartupWhen we boot into Windows, there are certain applications that are started immediately, these applications are called Startup programs. We also see many programs offer the option to start up with Windows, during the installation process. Some programs automatically attach themselves to startup upon installation while others do not.
There is a simple way to add any installed programs to the start up list so that you do not have to manually start it after Windows boots. In Windows 7, we have a “Startup” folder, where links or shortcuts for programs which start at Windows boot up are placed. Using this folder we can start any program we need.
Before you get started, locate the program that you need to start when you boot up your machine.
For example. If we would like Wamp Server to start up automatically,  
STEP 1: We locate Wamp Server in the Start Menu and right-click and click on copy.

STEP 2: Now we locate the Startup folder. It is located in the Start Menu. Click on Start button >> All Programs and find Startup.


STEP 3: Now right-click on the Startup folder and click on “Open”.
If you use multiple profiles on you Windows PC and want the program to start with every profile, click on “Open all users”.

As you can see, I already have a Facebook Messenger in the Startup folder on my computer.

When the folder opens you would see the shortcuts for other programs which start when Windows boots up.
Right Click anywhere inside the folder and click on “Paste Shortcut”. Now you would see your desired shortcut in the startup folder.
Alternatively, you can also create a shortcut for any program on the desktop and then paste it in the Startup folder. Make Sure you don’t paste the entire program, just paste the shortcut.
The next time when you restart Windows 7, the file or folder or program which you added will start automatically while booting.
Tip: Too many startup programs can slow down computer boot time, so choose the programs to include wisely. A good practice is to select programs which you really need every time the computer starts.

Wednesday, 17 October 2012

HOW TO CHANGE DEFAULT FAVICON IN BLOGGER.

KYD Evolution: HOW TO CHANGE DEFAULT FAVICON IN BLOGGER.
A favicon (Favourite icon) is the small image you see in the title bar of your browser when viewing a website or blog. Most of the time, the logo of the website is used as the favicon. Having your own customized favicon instead of the default blogger favicon is a good way to send that unique message out to your followers and readers and also to get visitor's attention. A favicon is necessary as it server as the finishing touch needed to portray the design and identity of a great looking blog.
STEP 1: Go to your blogger's dashboard >> Layout. You would be presented with the layout of your entire blog, your widgets position e.t.c. 
Step 2: Click on the edit link on the "Favicon" block with the default blogger logo on it. A new window should pop-up, where you can now browse for an image in your computer to choose as your new favicon.
Step 3: Click on the "Choose File" button and search for your already created favicon in .ico format, then click on save.
NOTE: .ico is a picture format just like the .jpg and .png picture formats that is specifically used for icons. Read our post on <a href="">How to create a favicon using photoshop</a>. 
Step 4: Now you should see your own favicon instead of the default blogger favicon. You can also use these methods to change your favicon at a later time.

Tuesday, 16 October 2012

HOW TO CRACK PC WINDOWS LOGIN PASSWORD USING OPHCRACK EASILY

KYD Evolution: HOW TO CRACK PC WINDOWS LOGIN PASSWORD USING OPHCRACK EASILY

There are times when you forget your password and you do not know what else to do. The Ophcrack Windows Password Cracker is by far the best free Windows password recovery tool available. It's fast and easy enough for an average user with a basic knowledge of Windows to use.
With Ophcrack, you don't need any access to Windows to be able to recover your lost passwords. Simply Follow the Steps below:-
1. Visit the Ophcrack Site, Download the free ISO image Here. The File contain all needed Files, Just Follow the Next Step
2. Burn it into a CD or Flash Drive, Then Insert the CD into the PC that requires the Password and Change the Boot Order to boot from the CD. Guess we all know How to Boot from CD or external disk??
The Ophcrack Program will start, it will locate the Windows user accounts, and proceeds to Crack the the forgotten passwords automatically. Once the Cracking is done, the passwords will be displayed on screen, just write it down.
Thats All.
In a test did on a Windows 7 PC, Ophcrack was able to recover a 10 character long password to my PC Administrator account in 40 seconds. I was wow!!!
Note:- Ophcrack currently supports Windows 7, Windows Vista, and Windows XP only.
Enjoy & Don't forget to Hit the Like, Share & Tweet Button.

COOL TIPS FOR CUSTOMIZING YOUR BLOGGER TEMPLATE.

COOL TIPS FOR CUSTOMIZING YOUR BLOGGER TEMPLATE.
The look and feel of a blog is equally as important as quality content being added to the blog on a regular basis. As a blogger, if you are as inquisitive as i am with how i can perfect how my blog looks and make it match my taste. Then i think this post should be helpful.

1. Choosing a custom Template

Aside from the default templates that came with blogger, it is highly recommended but not obligatory that one goes deeper into the blogosphere in search of templates that can redefine your blog. Check out our tips on how to choose a perfect template here. Google is a good place to start searching but here are some cool websites that you can get blogger templates from. www.bloggertricks.com etc.

2. CUSTOMIZING THE TEMPLATE FEATURES

If you are still using one of the default blogger templates, then you are in luck as blogger presents the opportunity for one to easily adjust widths, colours, and loads of other stuffs in a graphical user interface. To make use of this great tool, Go to Dashboard >> Templates >> Customize and explore the world of possibilities at your fingertips.
On the other hand, when you've upgraded to a more professional feel ;-), i mean when you are now using custom templates, the above mentioned procedure will not be useful as blogger will not be able to edit the custom templates automatically. In other words, you have to do your customizations and edits manually by going to Dashboard >> Templates >> Edit Html >> Proceed and then check the "Expand widgets" box. If you are familiar with Cascading Style Sheets (CSS) then this should be a walkthrough for you. Whenever i wanna edit a particular area in my blog, i make use of the "Inspect Element" feature that comes with browsers. To use this, i visit the page of my blog that contains what i wanna edit, right click on it and select "inspect element". From there, i can see the properties acting on that area.
A great took for this is Firebug in Mozilla Firefox. You can download FireBug here. With Firebug, you can easily trace which value or element is responsible for the action you want to perform. Firebug also allows you to preview your edits without refreshing the page. Awesome right??? Once you get the elements you want to edit, it's now easy for you to go to your dashboard, find the code and replace it with your desired value. Catch you guys later.

Saturday, 13 October 2012

HOW TO MANUALLY INSTALL FIREFOX EXTENSIONS


KYD Evolution: Firefox extensions 

Ever since i delved into the web and technology in general, i have continuously discovered the importance and growing need of extensions and widgets, regardless of your field. These extensions add an extra functionality to our work making it easier to create and work with great tools. Today we'll be talking about firefox extensions.
There are millions of firefox extensions out there that suits each category and aspect of life from gaming to development. Some of the extensions i use as a web developer include ColorZilla, Firebug, MeasureIt e.t.c Visit the Firefox extension library to get more extensions of your choice.

INSTALLING A FIREFOX EXTENSION. 

Normally, Firefox automatically installs its extensions straight from download but there are situations where you have no choice but to install there extensions manually. To do this
Step 1: Open your firefox browser and Go to Tools, then Addons.
Step 2: At the top-right corner, click on the settings icon and select install Addon from file.
Step 3: Browse to where your extension is and select it.
Note: Firefox extensions are in .xpi format.
Step 4: Your addon is installed. You might need to restart firefox before you can start using it. Thank you

Friday, 12 October 2012

Windows 7 Service Pack 1 (SP1)


What's included in Windows 7 Service Pack 1 (SP1):

Windows 7 Service Pack 1 (SP1) is an important update that includes previously released security, performance, and stability updates for Windows 7. SP1 also includes new improvements to features and services in Windows 7, such as improved reliability when connecting to HDMI audio devices, printing using the XPS Viewer, and restoring previous folders in Windows Explorer after restarting. Installing SP1 helps keep Windows 7 up to date. Applies to all editions of Windows 7.

Learn how to install Windows 7 Service Pack 1 (SP1):

How to get SP1

The recommended (and easiest) way to get SP1 is to turn on automatic updating in Windows Update in Control Panel, and wait for Windows 7 to notify you that SP1 is ready to install. It takes about 30 minutes to install, and you'll need to restart your computer about halfway through the installation.

To learn if Windows 7 SP1 is already installed:

Click the Start button , right-click Computer, and then click Properties. If Service Pack 1 is listed under Windows edition, SP1 is already installed on your computer.

Disk space requirements

Make sure you have enough free disk space to install SP1 (even though much of that space will be reclaimed after the installation).
Installation method and  Estimated amount of free disk space required

Windows Update   
x86-based (32-bit): 750 MB
x64-based (64-bit): 1050 MB

Downloading SP1 from the Microsoft website   
x86-based (32-bit): 4100 MB
x64-based (64-bit): 7400 MB

Installing SP1 using an installation DVD   
x86-based (32-bit): 4100 MB
x64-based (64-bit): 7400 MB

For general information about service packs, go to the Service Pack Center webpage on the Windows website.


Related Posts Plugin for WordPress, Blogger...
 
Blogger Widgets Twitter Bird Gadget